Photography, like any art, takes practice to improve your skills. The knowledge you’ve obtained from this course will be invaluable in honing those skills. But time spent taking pictures is just as important as study. When you apply what you’ve learned about the Exposure Triangle, or The Rule of Thirds, these techniques can be fully understood. Sometimes it can seem a bit frightening to get out and start taking pictures. You’ve learned so much, and where and when to apply it all can seem overwhelming. But with all of the examples and suggestions here, everything you’ve learned will become second nature in no time.
Crash Course Series
- Introduction
- History of Digital Cameras
- Equipment and Accessories
- Types of Photography
- Exposure and Composition
- Choosing Your Equipment
- Practice
- Additional Resources
- eBook
Continue your Studies
When going on a photo shoot, have a few notes on the techniques you want to explore. Aperture can be difficult to understand, as the numbers don’t match up as you’d expect. A smaller f/stop is a larger aperture. So you could create a simple diagram with a variety of aperture sizes and the f/stop numbers below them. This will help you remember their relationship to light exposure. Likewise, simple notes on which shutter speeds should work for the scenes you expect, can be handy. As can taking notes as you go along to reinforce your understanding.
Street photography is one of the best photography types to get into early on. As you walk down a neighborhood, conditions can change quickly. A car coming down the road will need a fast shutter speed to freeze its motion. And you’ll need a medium shutter speed and open aperture to get a portrait of someone walking their dog. Street photography really tests the foundation this course has given you. It also moves you beyond your comfort zone in a single particular style. A random photo taken might open up an entirely new dimension of photography for you. Over time, this information will become second nature and you’ll consider your settings less often. Instead, you’ll be spending more time composing images in your mind than taking pictures.
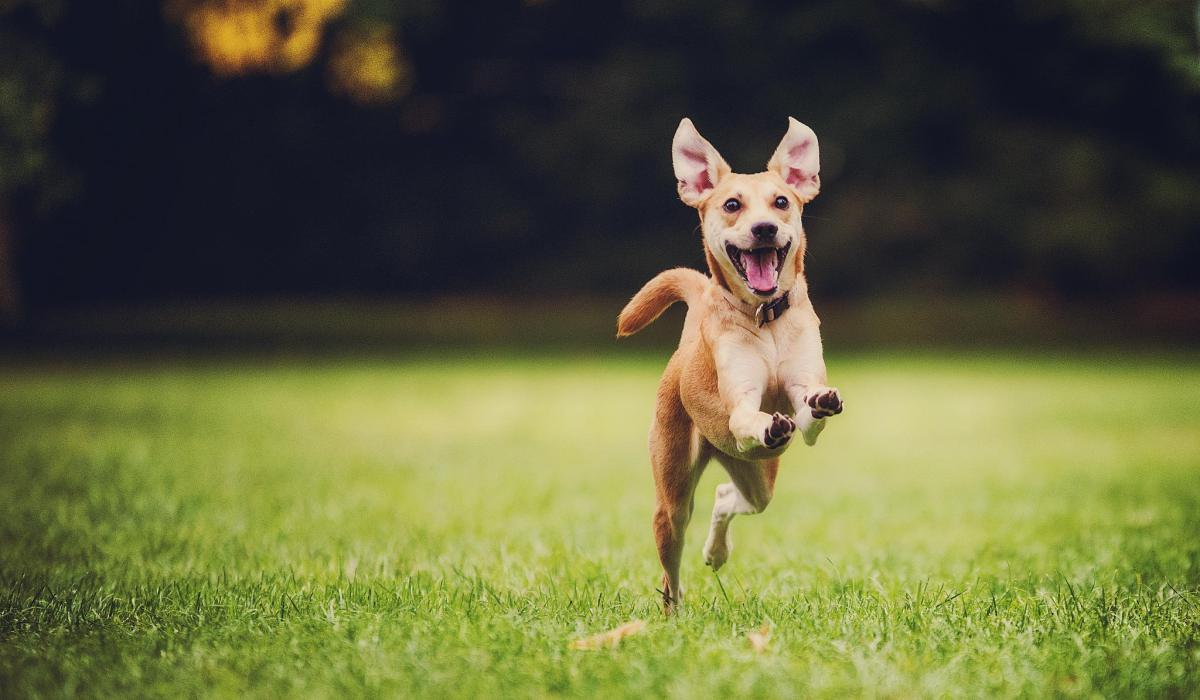
A running dog will require a fast shutter speed.
Play with Perspective
Perspective is also important to practice because many people only consider their personal view of the world when starting out. Spend time simply looking through your viewfinder or LCD screen. A scene that looks fairly boring to the eye often looks radically different through the camera. Play with that perspective; move around, get low to the ground, or hold the camera high up. Zoom in, zoom out, and play with both shutter speed and aperture. Try to envision your environment through the lens instead of your eyes. And also imagine what the scene could be instead of simply what’s in front of you.
What could be an ordinary portrait of a flower could instead be an insect’s view of the world when taken from below it. A busy road becomes blazing neon lights with the right shutter speed and a tripod. A frontal picture of a person is classic and beautiful but rather uninteresting in many cases. But what if you tried a shot from slightly above or even below them? Ask your subject to look off into the distance and set your autofocus points to the corner of the image. Instead of the usual picture, you’re now telling a story with it. Why does the subject look so thoughtful? What’s off in the distance past the space in the image? A daydream? A lover? Don’t limit yourself to what’s directly in front of your eyes; get imaginative with your work!
Diversify and Create Exercises
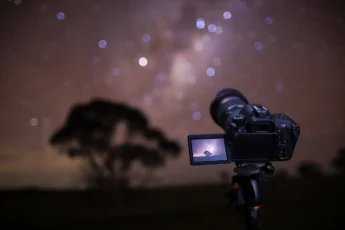
Even if you see yourself specializing in just portraits or landscape photos, it’s good to spend time trying each photography type. Maybe you have no interest in astrophotography at all. But spend a few minutes at night adjusting ISO and shutter speed to get a noiseless picture in the dark. The practice will help you see how they relate to each other. Or set up a few objects on a table of different sizes at varying distances from each other. Then you can make adjustments to aperture to see how it affects depth of field. For another exercise, shoot short videos and turn image stabilization on and off to see the difference. Play with your gear to find out exactly what you can do with it.
Not every photo or video you take has to be a masterpiece. But you still want to find out exactly what sort of photography you enjoy.
A spouse or pet can make a great subject for your portrait work. And of course, if you like landscapes, then you should spend time at your favorite park. This is when you want to try to create masterpieces of photography. If there are techniques or functions you don’t understand about your camera, create exercises to test them out.

Look around your environment and you’ll find subjects for your photos.
Find Work Taking Pictures
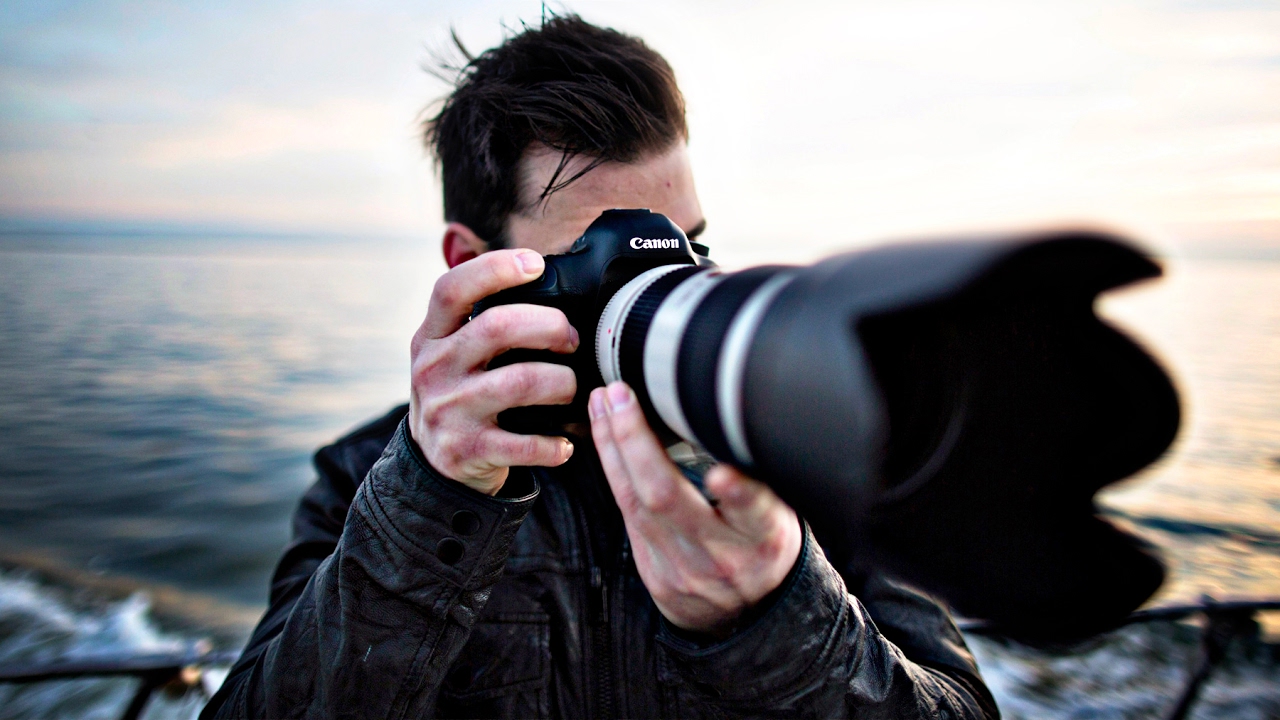
Part-time jobs shooting photography are also a good way to get additional practice. Many fine dining restaurants need photographers. They walk among tables and ask customers if they want their special moment immortalized. Sometimes it can be a bit intimidating for a beginner. Also, the lower lighting of many restaurants can be a challenge. But it doesn’t get any easier than having people simply sit still and smile for you. Just work on practicing the exposure triangle and have a tripod nearby.
For the student or part-time worker, photography at parks and zoos is another way to get more paid photography time. Families on vacation and tourists are prime customers, and businesses might not even think of having a photographer. So it’s easy to bring your camera and budding portfolio, and make the suggestion to the owner. The worst that can happen is they say no. And if you get a yes, you have a place to fine tune your skill and make extra money. Seasonal work also includes companies that hire yearbook and sports photographers for middle and high schools. They often provide top quality DSLRs, portable studios, and the training required to use them.
Photography gigs can be found online or on job boards. Sometimes people want an event, like a concert, covered by a photographer as a one-time job. Or if you’re feeling confident, a budget wedding shoot is a great way to expand your portfolio. For solo gigs, it’s strongly recommended that you get the basics of this course down, as they won’t train you. People will pay for surprisingly poor work sometimes, but motion blur, image noise, and bad exposure are unacceptable. So make sure you have the fundamentals down to avoid awkward situations with your customers.
Join a Photography Club
Photography clubs exist around the world. They vary in size and can be found at the local, state, and national levels. Local newspapers and asking other photographers you see shooting, are some of the best ways to find out about them. These clubs usually have a membership fee for six months to a year. But they offer benefits such as discounts on photography conventions, monthly competitions, free gear from vendors, and more. Also, many of the members will have decades of experience, and love to help new photographers find their niche.
For students, after school groups are often free, and are a great way to share knowledge in the art of photography. Also, group photography outings are easier to organize with a school group.
Websites like Meetup and Craigslist also make finding photography clubs in your area simple. In larger cities, groups specializing in a single photography type, like fashion or nature photography, can be found. And if not, you can always start and promote your own group. Clubs are one of the best ways to get quality feedback on your work and expand your social network.
Photography magazines often have lists of national and international clubs within them as well. They often have contests anyone can enter. There may be a small entry fee for these contests. Win or lose, photography contests mean you’re spending time in the field improving your skills. So if a certain contest theme excites you, by all means enter it and see how you do.
A place to store your work is essential. There are tons of excellent online photo hosting services such as Flickr, Pixabay, 500px, and Zenfolio. Many of them have a social media presence in addition to image hosting. And they usually offer both free and paid accounts for extra features and storage. The great thing about many of these websites is that even at the free level, you usually have enough storage for thousands of photos. Some will even allow for in-browser image editing like sharpness, monochrome, or cropping of uploaded photos.
You’ll also want to add SEO (Search Engine Optimization) keywords describing your pictures to drive traffic to your portfolio. From there, you can link your web page to Facebook, Instagram, and other social media-oriented websites to get more exposure. Or you can simply keep it to yourself and share as desired.
You’ll also need to organize your album in a logical and consistent manner. You might decide to organize your albums by location if you like shooting landscapes or nature photos. If you like portraits, you’d probably label them by subject or date. A night photographer will probably label location, date, and even the time. GPS information (geotagging) can also be included in many of these albums, along with a map. If you have time, add a title and commentary to the photo to keep people looking through your album. Instead of the default DSC8993.jpg title and nothing more, add details. Title your image, and comment on the moment or subject. Then people will want to look at more of your photos and see what you have to say about them.
Once you start storing images, sharing and getting feedback on your work is important. Online forums and discussion groups on photography usually have submission and critique sections. Other photographers can examine your work and offer feedback on your technique and style that will help you improve further. And remember that it’s not only about positive feedback. Positive comments feel good but don’t always help us improve as artists. When presented respectfully, you should give just as much importance to critical evaluations. Critical feedback should include how and what can be done to better your technique. Feel free to ask questions from the person who took the time to explain what could be better. And then thank that person for providing feedback. Hopefully they will return and keep offering ways you can improve your art.
It’s just as important to offer feedback of your own once you start having a good understanding of the basics. Studying and commenting on the work of other photographers will ensure your understanding of photography is well rounded.

Read the User Manual
Very few people bother to read their camera’s user manual. Even professional photographers often assume they know most or all of the settings of their camera, and so there’s no need to read the manual. There are often tons of hidden features that may be of use to your style of photography. Things like active dynamic lighting to balance light and shadows in high contrast images, aren’t always mentioned on the box.
HDR (High Dynamic Range) photography is popular, and many cameras come with it preinstalled. HDR programs take three photos at three different exposure levels and combine them into a single photo. This combined photo shows greater detail in both bright and dark areas.
Focus bracketing is wonderful for capturing a range of photos with different depths of field. You can then select a photo with the focus exactly where you want it. Exposure bracketing is very similar, only it takes a series of photos with adjusted exposure values. Some features might never get used, while others will become mandatory.
Many DSLRs and mirrorless cameras also have Fn (function) buttons that can be set to specific features. For instance, you could key wireless activation, ISO, monochrome, and exposure bracketing to four custom buttons if you use them often. This saves time navigating through various menus to find them.
Also, reading the manual is important because sometimes functions interfere with one another. If your camera has an electronic shutter, it probably has a Silent Mode you can activate. Many photographers leave Silent Mode on 24/7. But they may not know that there’s a limit to how slow their shutter speed can operate using a rolling electronic shutter. The user manual spells out these little details that might otherwise go unnoticed.